Ready to sell your art?

Have you just completed a new artwork but you are wondering how
to set the right price? If yes then you are not alone. Creating an art is one
thing and setting price is another thing. When pricing your artwork, there are several
things that you need to put into consideration. In this article, we are going
to give you tips on how to set prices for your art.


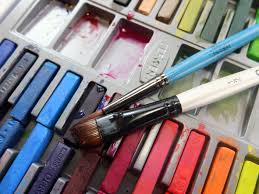
  1. Calculate the total cost of material used

The first thing that you need to consider when setting price
for your new art artwork is by determining the total cost of materials used to
create the artwork. Nobody wants to charge less than the total cost of material
used to make the artwork. Even if you bought your artwork materials in bulk,
you can still come up with a price estimate. Your artwork should never cost
less than the total cost of material used.


  1. Determine the cost of labor

This is another crucial factor that you need to factor in when
setting a price for your artwork. Determine the amount of time you spent
working on an individual artwork then come up with a price that you should be
paid per hour. However, you need to be very careful when determining the amount
that you should be paid for labor. Most beginners usually stand a risk of
overvaluing themselves. As a beginner, you need to set a realistic price. As your
business and reputation grow, your price will also go up.


  1. Consider the size of the artwork

When setting price for your artwork, you should also consider
its size. Under normal circumstance, smaller artwork, require less materials
and less time to complete. As a result, they should cost less when compared to
larger artwork that has been made with similar materials. This is because a larger
artwork require more materials and more time to complete.


  1. Consider what other artists in your industry charge

This is a very important factor that many people usually
overlook. Before you come up with a final price value for your artwork, it is recommended
that you first conduct extensive research to determine what other artists in
your industry with similar arts are charging. It is not prudent to set a price that
is by far higher than what your competitors similar arts are charging. If you
do so, then most buyers will turn to your competitors. It is very important to consider
the price that other artists within your industry are charging before you set a
price for your artwork. This way, you will set a price a price that is realistic
and competitive.


  1. Consider your education level and experience

Your level of education and experience should also determine
the amount that you should charge for your artwork. For instance, if you acquired
your art skills in a well-known school or from a well-known artist, then your price
should be different from a self-taught artist. You also need to consider your
level of experience. If you are new artist in the industry with no former sales,
then your artwork price should not be the same as the price set by an experienced
and well established artist.

Need an seo service Philadelphia to help get your business to the top? Connecting Your Customers is the ultimate bridge between the internet and the people you want to find you. Call for a consultation today!

Color Theory


Colors are very important. They make things look good and bright,
whether it is your artwork presentation or the cloth that you wear. However, it
is very difficult to know which color combination blends well and that is where
color theory comes in. Color theory is an art used to create harmonious color combination
that are pleasing to the senses and the eye. Color theory is very important because
it enables us to understand how colors can be blended, coordinated, arranged
and related to each another. By understanding color theory, you will actually get
to know why some colors blend well while other don’t. Color theory is all about
the visual effects of colors.


Why color theory is so important


  1. It helps you learn how to use colors effectively


If you work in the art industry, then you definitely know
that colors make a huge difference both in branding and marketing. In fact, the
blends of colors that you use on your artwork can determine if your target audience
will like it or not. Color theory will help you know how to use colors effectively.
You will know how to mix the right blend of colors it order to get an outcome
that will be visually pleasing to your audience.


  1. It helps to influence the perception of customers


The blend of colors that you use on your brand can influence
the perception of your audience. It is up to you to determine which colors will
capture the attention of your customers and influence them to take an action. By
learning about color theory, you will be able to learn color branding techniques
that will help you connect better with your target audience. Color theory can
help to strengthen brand consumer relationship as well as increase your profit
margin.


  1. It helps to define a brand


Various studies have shown that up to 90% of people asses
brand based on colors alone. This means that brand color is one of the main
factor that influence customer behavior. The product or services that you offer
should actually correspond to the color that you use. In other words, the personality of your product
or service must be reflected in the brand’s color. Color theory will help you
choose the best brand color that will blend well with your brand personality. It
will help you choose colors that will effectively suit the characteristics of
products or services that you render to your esteem customers. It will help you
choose colors that will differentiate you from your competitors.


  1. It helps to build trust and customer loyalty


Consistency is very important in branding. It helps to build
customer loyalty and trust. As a business owner, it is very important to earn customer
trust. If the color and tone of your brand changes frequently or if your brand color
is inconsistent, then you can easily damage the perception of customers. Color
theory can help you build a consistent brand image that will help strengthen
your relationship with your audience by creating greater familiarity.


Thanks to NW car window tinting for being very generous and enthusiastic supporters of our site!

Painting Watercolors

All artists have had “firsts”. Every first-time art class or workshop starts with a materials list from the instructor. Every art book begins with a chapter on “materials,” and the artist usually offers his or her own favorite palette colors.

So what should a beginner watercolor artist tools? There are a basic list of watercolor art tools, that will get the new artist painting along in about anyone’s workshop. You can always add something the instructor is demonstrating to your tool box later.

1) Palette – use a large plastic palette with 30 wells and 2 center areas for mixing. Way more than you will need, but get one with approximately 20 wells so that you have room to add colors that you discover as you learn to paint. A ceramic palette is lovely and does not stain but it is also heavy and not ideal for traveling back and forth to class.

2) Paint colors. Here starting with 12 basic colors will get you quite far in your painting endeavors. Here’s best-recommended color list:

Brown Madder
Burnt Umber
Raw Sienna
Hooker’s Green Deep
Azo Yellow
Gamboge
Perm Red Deep (or a good solid primary red)
Quinacridone Rose (or Alizarin Crimson)
Ultramarine Deep
Cobalt Blue
Prussian Blue
Indigo

Different manufacturers use different names but many are the same. Shop around. You don’t need lots of greens, oranges, purples to start. You can mix many of the colors that you need. This basic palette will give you room to experiment and expand as you want to add other colors like Quinacridone Gold (one of my favorites!) or a lovely Turquoise or Cerulean Blue for interesting skies. Paint is quite expensive so look for sales. You want tube sizes of approx. 14 or 15 ml. The rest are too small to fill the paint wells. You do not need white ,you can use white only for mistakes! Black is not a necessary color either – you can mix lovely darks with the colors listed above.

3) Paper. first purchase is a small pad of what is supposed to be 140-lb watercolor paper. That is a standard weight that many artists use. But you can purchase a much higher quality watercolor block by Arches and it can an “AHA Moment”! The original paper was really much lighter, had poor texture and the paint did not flow and adhere as nicely as with the better paper. So don’t go too cheap with the paper – you will not learn the really paint unless you use good paper.

4) Brushes can make or break your painting too. there is a large selection of all sorts – synthetic, 50%/50% synthetic and natural, and 100% natural hair bristles. Each serves a purpose and creates different strokes. A good synthetic 1 1/2″ brush is perfect for initial washes of color or water. You will want a 1″, 1/2″ and maybe 1/4″ flat brush, and a #4 and 8 round. If you get a good deal on 50/50 brushes, take it.Some of the brushes also have a chisel point end so you can scrape tree branches and lines.

5) Extras – Just a few more things that you will need to complete your tool kit.

Any plastic container will do for water – old Tupperware containers are great.

You will need a roll of paper towels, and a box of facial tissues (do NOT buy the kind with lotion in them! Basic grocery store brands are fine).

Large Spray bottle that “sprays”, not shoots a stream (check home improvement store or dollar store).

Sketchbook. Can’t plan out your painting without one!

Paint Tube Wringer: this is a great investment! Paint is very expensive so you want to wring the last drop out of the tube (like toothpaste… ). Just insert the tail of the tube and wind it toward the front slowly.

Masking fluid – this is rather optional but many instructors will demonstrate this in a workshop. Choose “Temporary” masking fluid, or Drawing Gum. Masque Pen makes one too. Buy a cheap brush to apply the masking fluid or it will ruin any good brush!

White eraser. You can draw with any pencil but purchase a small white eraser – don’t use what’s on the pencil or you will mark your watercolor paper.

Thanks to this locksmith Hillsboro for sponsoring this post!

Improve your Drawing

We are deeply inculcated with symbolic assumptions. When we start to draw there is a delink between what we usually see at. This is not just a variation in syntax; it is the result of conformity of symbols within our racial subconscious that shows itself as soon as a pencil touches paper.

For example, a beginner’s portrait drawing exhibits many of the same characteristics as that of children: The eyes are elliptical and the head an oval. These are symbols of eyes and the head.

Even a professional artist with many years of experience and training constantly struggles with extricating these symbolic preconceptions from their work. Often an artist will subconsciously invent their symbols — instead of drawing elliptical eyes they will tend to draw their own eyes.

An artist’s training should begin with learning how to strike the overall shape of an object accurately. But even beginning with a simple object such as a shoe box involves a set of complex actions. First, one needs to gauge how big to draw the box relative to their drawing paper (or canvas). Second, the height to width proportion needs to be accurately established. And, third, the angles of the shoe box must be rendered correctly to convey spatial dimension convincingly.

A beginning artist’s initial lessons should be to acquire the skill of accurately assessing and drawing any given rectangle. This will train you to immediately assess any subject’s height/width proportion, a critical component to drawing accurately.

Do you wish to impress people with your own drawing skill? Or do you want to draw like a professional? If you do, then you can impress people by drawing like a professional artist. Here are 5 tips to draw like an expert!.Below are easy ways to improve your drawing skills.

1. Start drawing with the left hand

Scientific investigations have shown that people who are artistic and are good at painting are mostly left handed. Hence, to draw like the experts, you should start drawing with the left hand. If you are already left-handed, then you should keep drawing with your left hand. Right-handed people should get use to drawing with their opposite hand.

2. Stretch your hand and forearm muscles

If you want to be a good drawer, then you should have flexible wrist, fingers and hand muscles. The more flexible your wrist, fingers, and hands are, the more you able to illustrate complex pictures. This is also useful if you need to paint pictures in hard to reach or difficult places like on a ceiling or between narrow crevices.

3. Solve a lot of math problems

Scientist has found that if you do a lot of math problems, people’s drawing ability and imagination is five times better than people who don’t do math problems at all. This is because when you do a maths problem, you engage the right side of your brain which makes you illustrate pictures and objects better. Maths problems also help you to focus which is very importing in the drawing.

4. Play lots of videogames

To illustrate like a professional, you have to have very good hand-eye co-ordination. One of the best ways to improve your hand-eye co-ordination is by playing videogames. This is because according to scientists, videogames is the best way to train your hand-eye co-ordination than any other activity. They find that first-person shooter games like Call of Duty as one of the best ways to improve this ability.

5. Use only black or grey pencils

The difference between an amateur illustrator and a professional artist is shading. Shading is the hardest technique to draw as it involves a precise amount of color or pencil filling and imagination. The best way to improve shading is only using the black or grey pencil. A black or grey pencil is the best way to shade because you have to concentrate on contrast really. No other color can give you the best contrast than a black or grey pencil.

Sustainable Construction Solutions is an amazing fence company near me – you should check them out!

For Beginners


In case you wish to learn drawing, you must know what materials that will enable you to succeed in the drawing. As a beginner artist, you must get the right recommendations on best materials and tools. So, if you are a beginner in this skill, read on to know what materials are the best for new artists to learn with.

Pencils

Do not start drawing with pens. Pencils are easy to control and quite easy to use, you might have seen many artists who use the pen for finishing the drawing as a drawing finished with pen looks nice and prominent. But as a beginner, one should never think of using a pen instead of pencils. Pencil lines are easy to erase, so if you make a mistake, you can always go back and make corrections which would not be that easy if you use the pen. Also, good drawing quality pens are not cheap, so keeping everything in mind opt for pencils.

Papers to draw on

Do not draw on a huge sized paper. When starting out don’t use a huge sized paper that is not easy to handle. Best is to use a notebook. Only thing checks that the quality of the paper is good so that when you rub out something with your eraser, it does not look dirty. Another thing that is very important to keep in mind while creating your initial sketches –always use an HB or H2 grade pencil, and use very little pressure so that the lines are faint enough. That way when required you can easily erase them without making the work look unclean.

Eraser

You should make an eraser that erases cleanly. But it’s not about pencils and paper alone your eraser also plays an important role here, unless you have a good quality eraser there is a chance you will have difficulty in producing a clean drawing. You may already have some erasers at your disposal check them as to whether those are of good quality, if not get a new one from the nearest art supply store.

Handy cloth

Have a piece of cloth handy.A piece of white cloth can be a very useful implement. Use it to clean your hands before you touch the drawing paper. You can as well use it to clean your notebook after you erase some part of your drawing. And if you have the habit of resting your palm on the notebook itself lay the cloth on the paper and rest your palm on it.

Tracing paper

If required take help of tracing paper in the initial days. Have a bunch of tracing papers; this can be very helpful for the budding cartoonists when they’re approaching comparatively complex drawings. Trace the outline and important parts of the figure that you intend to draw on the tracing paper. And then place the tracing paper on your notebook and pencil through the tracing lines. By doing that you will have pressure lines now your notebook itself, use that as a guideline and fill in the details. Voila! You have just produced a great drawing.

Grid papers

Grid papers can be your friend.Like tracing papers, you can make use of grid lined papers. When drawing on a grid lined papers, you get a clear idea of size and proportions of what you are trying to draw because you analyze that way taking the grid lines as reference. And this technique can train you quickly on how to analyze the subject regarding shape, size, and proportions.

Last but not the least check your passion quotient:

Now let’s talk about the most important thing then you should have in your store that is the passion for drawing if you have enough passion you can make drawings without fancy tools. But if it is otherwise any number of high-end drawing tools may not be sufficient. So check that before jumping into this.

Thanks DMT lawn care services or getting our blog up and running, we appreciate you!